A complete auto A/C service starts with a clear purpose. The technician examines your system to quickly identify the root cause. Each step is intentional and builds toward tangible results. The process keeps your comfort at the center of every decision. The visit gives your vehicle the cooling strength it needs every day.
What a Complete Auto Air Conditioning Repair Includes
A complete auto A/C repair covers system testing, part inspection, and performance checks. The process reveals the exact source of weak cooling or airflow issues. The technician reviews refrigerant levels, electrical parts, and visible signs of damage. The visit builds a clear action plan for your vehicle without delays.
Initial Conversation and Symptom Review
The service starts with a direct talk about your cooling concerns. The technician asks when the issue began and how the air feels during use. The goal is to match your notes with common A/C patterns. This detail helps the technician narrow possible causes fast. Your feedback guides the diagnostic path that follows. The early review supports accurate testing and faster solutions.
Temperature Testing and Airflow Check
The technician measures vent temperature to confirm cooling strength. This reading gives a clear picture of system performance under load. Weak airflow or warm air helps identify deeper issues early. Standard readings from factory charts guide each comparison. The airflow test also indicates problems with the blower motor or the duct. These numbers shape the rest of the inspection.
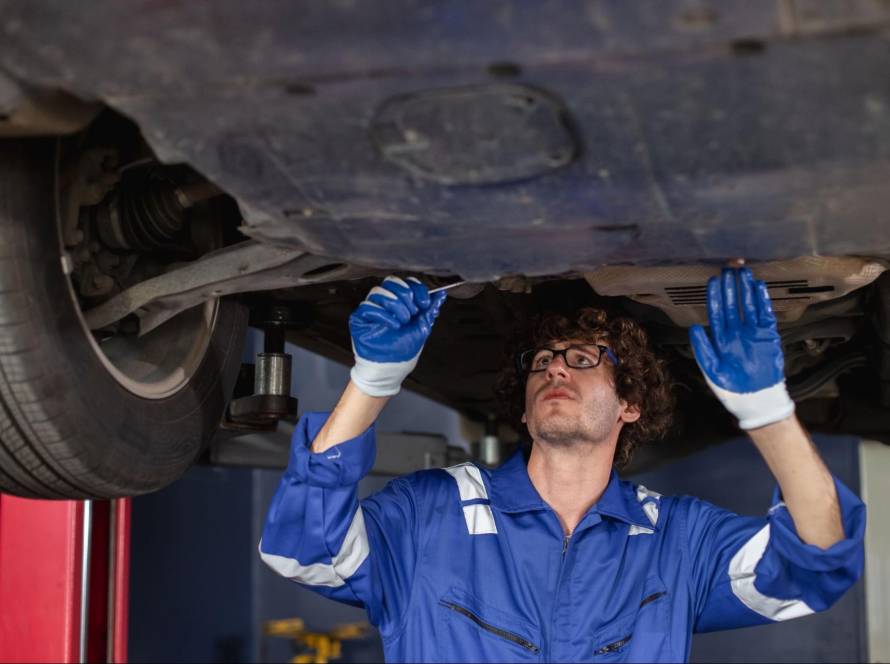
Visual Check of Key A/C Parts
The technician studies the compressor, hoses, belt, and wiring for wear. This step reveals stains, cracks, or leaks that point to trouble. Damaged seals or corroded lines often signal refrigerant loss. The condenser and evaporator also get a close inspection. Each part helps the technician confirm early guesses. These visual signs guide the complete repair plan.
What Happens in an Auto Air Conditioning Repair
A complete auto A/C repair visit follows a structured process that accurately targets cooling issues. The technician inspects each component to identify faults that compromise your comfort. Every test and inspection adds clearer insight into system health. This approach supports strong airflow and reliable cooling during daily driving.
System Tests During a Cooling System Check
System tests confirm system health with precise diagnostic data. The technician carefully reviews pressure levels and electrical signals. Each reading reveals deeper issues inside the cooling system. The results provide strong direction for the next step.
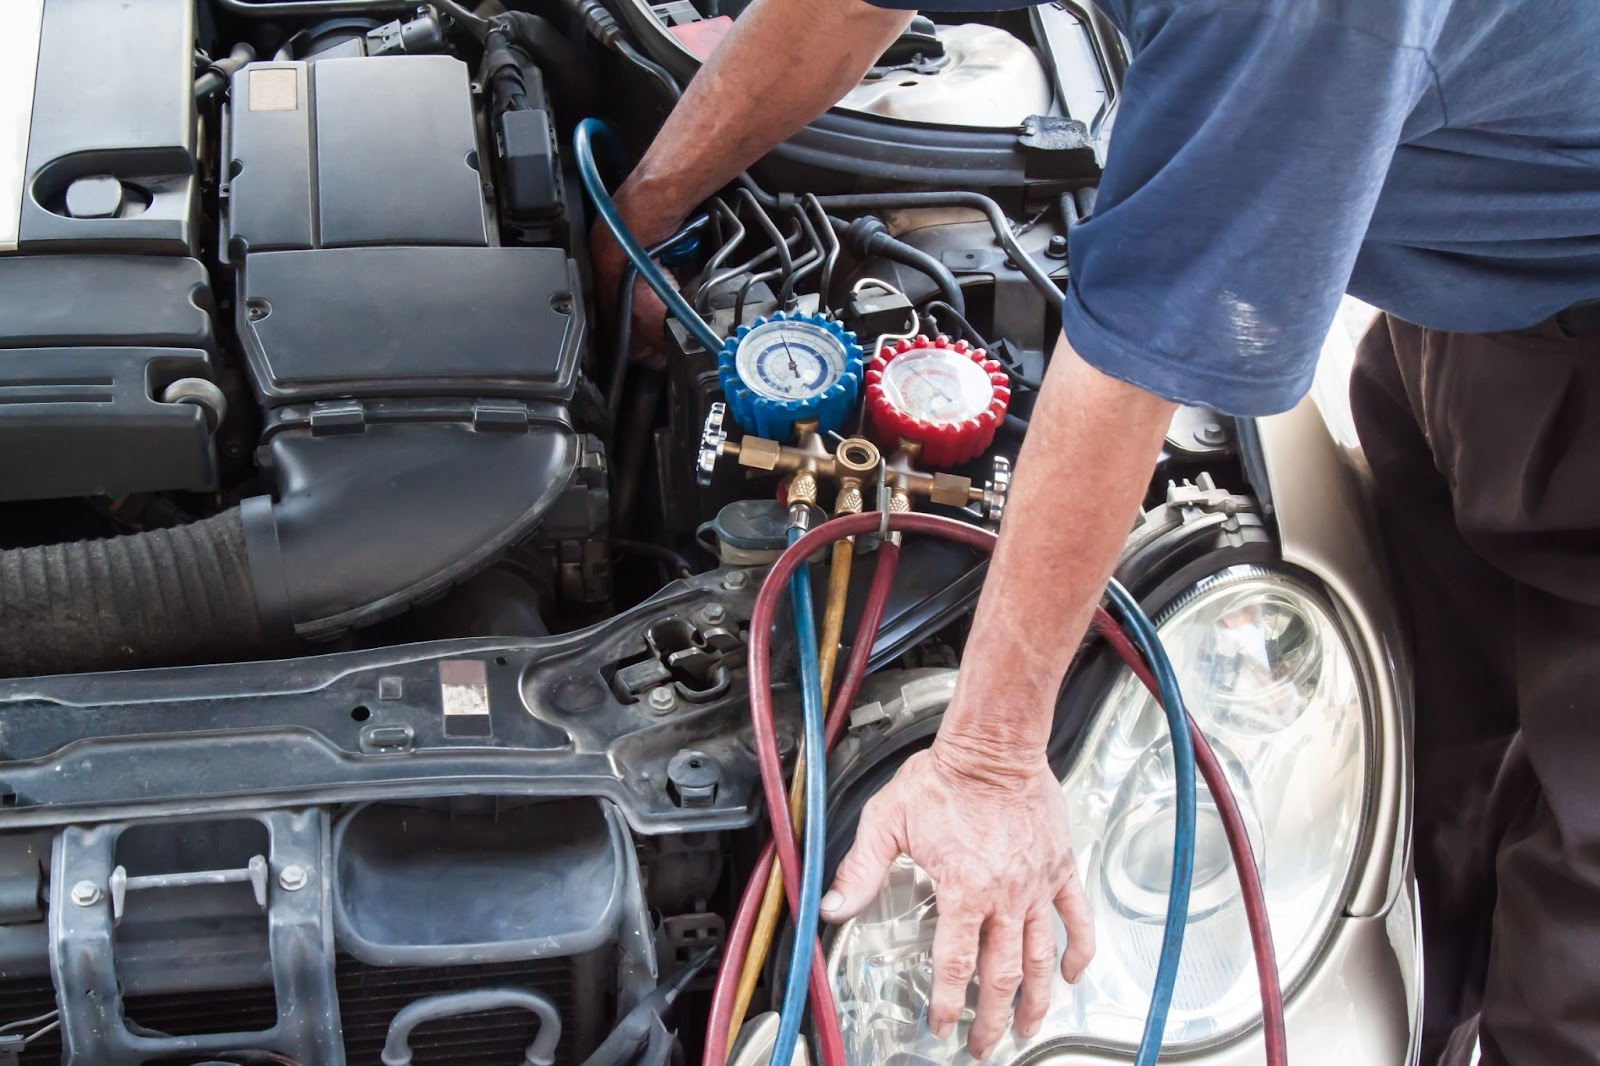
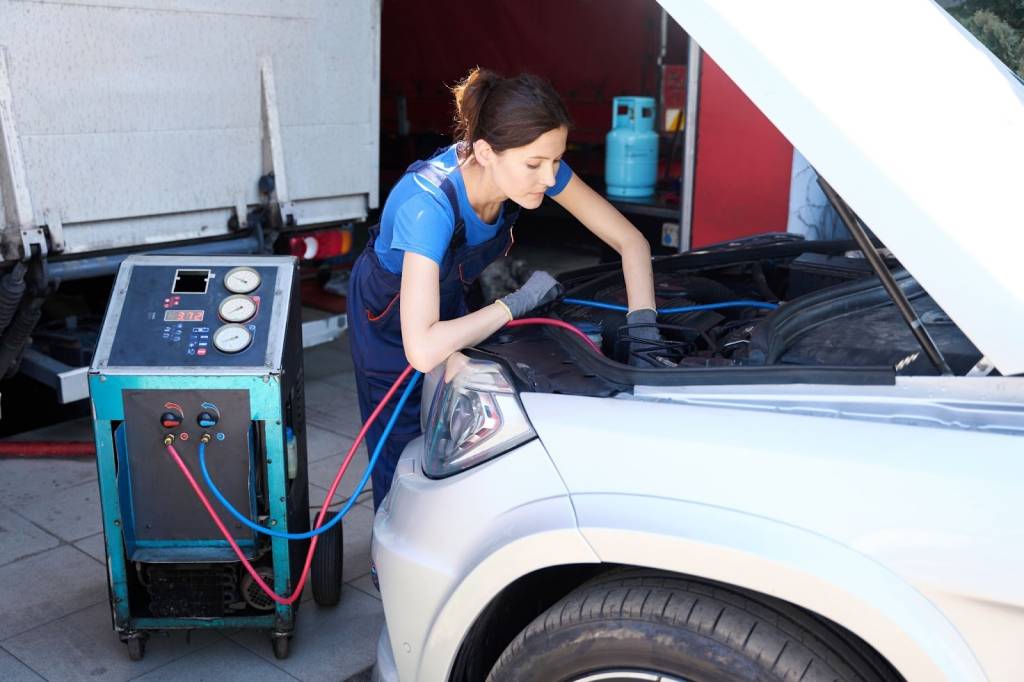
Pressure Gauge and Refrigerant Tests
The technician connects gauges to measure system pressure. These numbers indicate balance problems in critical cooling components. Low pressure suggests refrigerant loss or deeper mechanical issues. High pressure may show airflow blockages or restricted flow paths. The technician uses these readings to isolate system faults. These tests establish a reliable path toward accurate repairs.
Leak Checks With Dye or Electronic Tools
Leak testing finds refrigerant escape points inside the cooling system. Dye under UV light highlights small cracks or worn seals. Electronic detectors locate leaks that hide behind tight components. Each method supports precise repair planning for the technician. The results prevent future refrigerant loss during daily driving. These steps protect long-term cooling performance.
Electrical and Control System Tests
The technician checks relays, switches, and control signals for accuracy. Weak wiring may cause steady cooling to break down during warm weather. The climate module receives tests to confirm correct responses. Blower circuits also get checked for smooth airflow control. These steps expose hidden faults behind cooling problems. The technician uses each reading to build a complete diagnosis.
Component Work During the Cooling Inspection
Component work restores strength to worn or damaged cooling parts. The technician replaces failing components before they cause more strain. Each repair improves airflow and stabilizes temperature control. The steps rebuild smooth cooling throughout your cabin.
Replacing Hoses, Seals, and Lines
Hoses and seals break down over time and under heat. The technician removes worn parts to quickly stop refrigerant loss. New seals protect pressure control throughout the system. Lines also get replaced when corrosion weakens metal surfaces. These updates support long-term cooling stability and comfort. The result helps prevent new failures during heavy heat.
Servicing Compressor, Condenser, or Evaporator
Major cooling parts often fail under long-term strain and heat. The technician checks noise, wear, and internal compression issues. Faulty compressors get replaced to restore a strong cooling flow. Condensers are replaced when clogged fins block heat transfer. Corroded evaporators also lose performance and require replacement. These updates bring steady cooling back to your cabin.
Cleaning Cabin Filters and Duct Areas
Cabin filters collect dust, slowing airflow during daily driving. The technician removes debris to quickly restore smooth ventilation. Clean filters reduce blower strain and improve cabin freshness. Duct cleaning removes buildup that restricts airflow. These steps support stronger airflow at every fan speed. Clean paths help maintain consistent cooling.
Refrigerant Steps in the Cooling Process
Refrigerant work restores cooling strength inside the entire system. The technician removes old fluid before adding a fresh charge. A vacuum cycle clears moisture that harms cooling parts. The final refill sets up the system for performance tests.
Recovering Old Refrigerant Safely
The recovery machine removes old refrigerant with careful control. This step protects air quality and shop safety standards. Captured fluid gets stored for proper disposal later. The cleared system helps avoid contamination during service. These steps prepare the lines for the following vacuum phase. The technician builds a clean foundation for renewed cooling.
Vacuuming Moisture and Air From the System
Moisture harms cooling components by causing internal corrosion buildup. The vacuum pump removes air pockets and trapped water inside. Dry lines help refrigerant flow smoothly during cooling cycles. This step also clears leftover contaminants from older repairs. A dry system delivers colder air with consistent output. The technician monitors gauges to confirm the success of moisture removal.
Charging Refrigerant and Adding System Oil
The technician fills the refrigerant to exact factory specifications. This precise charge restores cooling power inside your cabin. Extra refrigerant harms performance and reduces airflow quality. Too little refrigerant weakens cold output during warm days. System oil protects compressor parts during long operation cycles. Proper levels support long-term cooling reliability.
Final Cooling Performance Review
Final checks confirm cooling strength after the complete service. The technician tests air distribution and temperature accuracy. A control review confirms smooth cabin operation. The appointment ends with clear evidence of restored performance.
Vent Temperature and Cooling Balance Test
The technician measures vent temperature after the recharge step. Lower readings confirm strong and steady cooling output. Balanced airflow supports comfort inside every cabin zone. The system should shift modes with smooth response times. These checks validate earlier repair decisions and steps. The results help confirm long-term cooling strength.
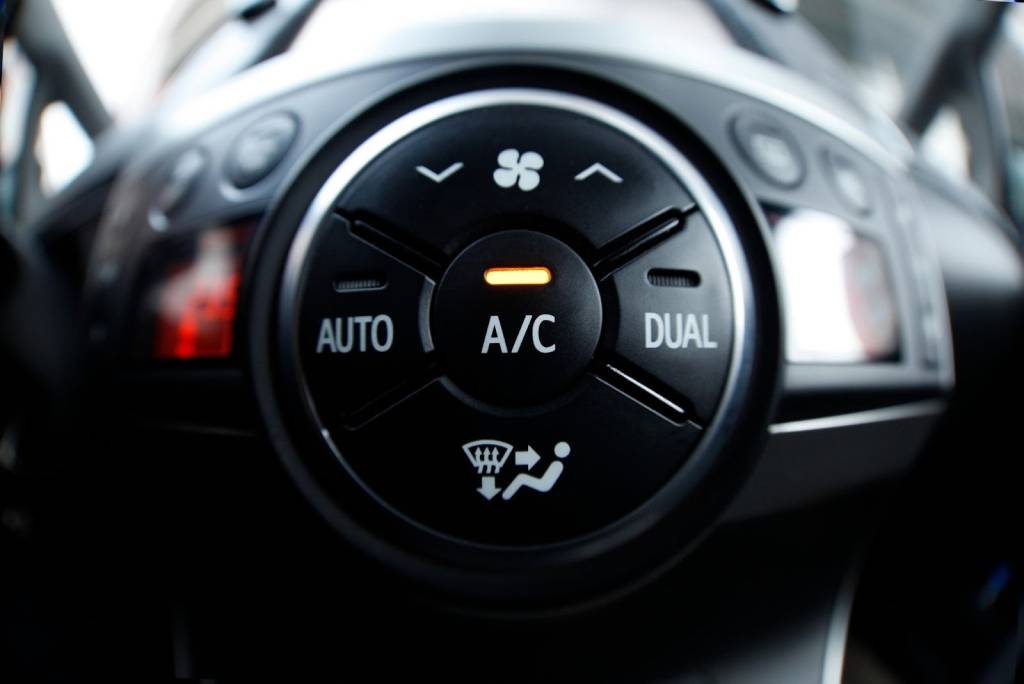
Fan Speed and Air Distribution Review
Fan tests confirm airflow at every speed level. Weak speeds may show blower resistance or resistor failure. Air distribution tests examine mode changes under different loads. Air should shift smoothly between upper and lower vents. Poor shifts suggest problems inside the cabin control doors. These checks bring confidence to the final review.
Road Test and Final Quality Review
The technician drives the vehicle to confirm stable cooling. The system should feel consistent at both idle and speed. The compressor should sound smooth, with no extra noise. Airflow should stay steady during every change in direction. Cabin temperature remains firm throughout the drive cycle. The technician completes a last inspection to verify results.
Costs and Timeframes for Cooling System Work
Costs depend on labor time, part condition, and system complexity. Timeframes shift based on the number of issues found. Some cars need simple fixes while others need major parts. The technician provides a precise estimate before repairs start.
Labor Time and Part Pricing Factors
Labor cost reflects the time required for each repair. Some parts install quickly, while others take longer. Compressors and evaporators require more steps to remove. Hoses and seals require less labor time. Prices rise when corrosion affects multiple areas. These factors shape your final estimate.
Reasons Some Visits Take Longer
Some leaks hide deep within the system. Electrical faults also slow down testing when tracing wires. The technician must rule out several causes. Multiple failures add more repair time. Old repairs can create new problems to solve. A careful pace prevents future breakdowns.
Repair vs. Replacement Decisions
Some parts fail beyond effective repair. Worn compressors rarely hold long after rebuilds. New units offer stronger reliability for summer heat—condensers with blocked fins waste cooling potential. Replacement often saves money over repeated failures. The choice aims for long-term comfort.
Preventive Planning for Cooling Care
Preventive steps reduce future cooling issues. Seasonal checks catch problems early. Clean parts improve airflow and comfort. Minor fixes prevent sudden breakdowns.
Seasonal Auto A/C Checkups
Seasonal checks help prepare your car for the heat. The technician reviews pressure and airflow before summer. Early checks reduce the risk of costly repairs—clean filters and a properly charged system support steady cooling. Minor adjustments help keep
your system strong. These visits support reliable performance all year.
Keeping Parts Clean Year-Round
Dust builds up around the condenser during daily driving. Cleaning helps improve airflow and cooling. Cabin filters trap dirt that slows circulation. Fresh filters reduce strain on the blower. Clean ducts move air more easily. These habits support comfort and system health.
Warning Signs That Need Fast Attention
Warm air during idle signals compressor strain. Strange sounds hint at clutch or bearing issues. Moisture on vents may show blocked airflow. Weak airflow suggests filter or blower failure. Strong odors signal mold in the system. Any shift in comfort needs fast service.
Restore Comfort With Auto Air Conditioning Repair
A smooth cooling system shapes every drive, mainly when heat builds fast on daily routes. A quick appointment helps your vehicle regain steady airflow and crisp cabin temperatures without added strain. Minor issues grow when left alone, so early service protects your comfort and prevents higher costs later. This moment gives you the chance to schedule expert A/C care before rising heat turns a minor problem into a significant setback.
Strengthen your knowledge with fresh tips and expert guidance from the Monkey’s RV & Auto Repair blog and keep your vehicle ready for any drive.